
PLA filament is the most popular, easier to use, and most widely available material on the market. In this guide, we are going to dive deep into the basics of PLA filament for 3D printing. We’ll talk about what it is, the insane variety of types, the printing settings, post-processing, proper storage, and what it’s used for.
What is PLA Filament?
PLA stands for Polylactic Acid. Unlike traditional oil-based plastics that require heavy petroleum refining, PLA is actually a bioplastic. It is made from renewable plant resources like corn starch or sugarcane. Because of its plant-based origins, PLA printing filament is widely considered an eco-friendly option.
It is the most popular 3D printing filament in the world because it is incredibly easy to print. It doesn’t wrap easily, sticks to the bed like a dream, and doesn’t require a fancy, expensive heated enclosure. Moreover, its smell is very mild during printing process. Sometimes, it smells faintly sweet, like pancakes or maple syrup when it’s melting. This is indeed a good compromise choice.
The Different Types of PLA Filament
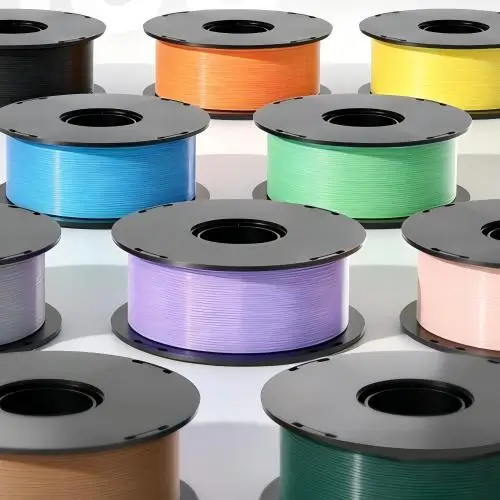
There are numerous options for PLA printing materials. You no longer have to be confined to the monotonous flat colors; instead, you can fully unleash your creativity. Next, let’s take a look at the various common PLA materials.
Standard PLA
Standard PLA filament is cheaper, reliable, and gets the job done for 90% of your everyday printing needs.
PLA + / Tough PLA
Standard PLA is great, but it has a minor flaw: it can be a bit brittle. If a standard PLA printed object is dropped onto a hard floor, it might snap. In such cases, consider using PLA+ (sometimes called Tough PLA). Manufacturers mix in special additives to give the plastic more flex and impact resistance. If you are printing functional parts that need to take a beating, PLA+ will be your best choice.
Aesthetic Variations
Sometimes you just want things to look pretty without sanding and painting.
- Silk PLA: It has a high-gloss, metallic sheen that makes prints look like they were cast out of solid gold or silver. Just keep in mind that the additives that make it shiny also weaken the layer adhesion. It’s for looking at, not for touching.
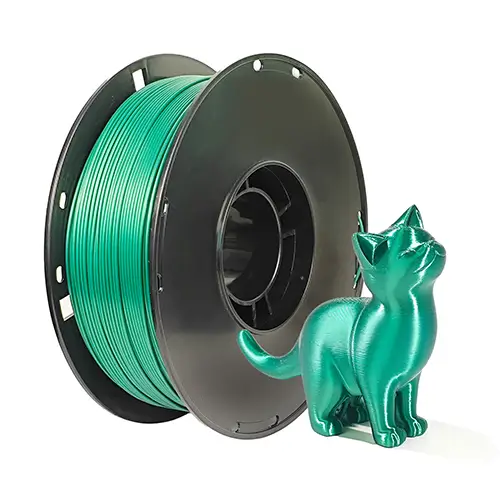
- Matte PLA: It absorbs light instead of reflecting it, which magically hides 3D printed layer lines. It gives your parts a premium, injection-molded look.
- Dual/Tri-color Co-extrusion PLA: The filament strand itself is split into two or three different colors down the middle. As your printer puts down the plastic, the color of the final object shifts depending on what angle you view it from. It is perfect for printing smooth, curvy objects like vases.
Composite/ Filled PLAs
Manufacturers take standard PLA printing filament and mix it with wild materials.
- Wood-filled PLA: This actually contains real recycled wood powder and fibers. It looks like wood, and prints like wood, rather than just being sanded and colored like real wood.
- Carbon-fiber Infused PLA: The carbon fibers make the PLA incredibly stiff and lightweight. However, carbon fiber is essentially tiny shards of rock. It will chew through a standard brass nozzle in hours. You must upgrade to a hardened steel nozzle.
- Glow-in-the-dark PLA: It looks amazing at night, but just like carbon fiber, the glowing strontium aluminate powder is highly abrasive. Say goodbye to your brass nozzle if you try to print this without upgrading first.
Basic Print Settings of PLA Filament
The secret to mastering PLA filament for 3D printing is dialing in your slicer settings. The right PLA 3D printing temperature is the difference between a messy blob of plastic and a flawless masterpiece.
- Nozzle Temperature: 190°C – 220°C. Every brand of PLA for 3D printing is slightly different, so I always recommend printing a “temperature tower” first to find the sweet spot for your specific spool.
- Bed Temperature: 50°C – 60°C or unheated if you use glue or tape. If you use a glass bed with a healthy slathering of a glue stick or blue painter’s tape, you can print PLA on a completely cold bed. But a heated bed at 60 ℃ makes life so much easier.
- Cooling Fan: 100%. PLA loves cool air to freeze the plastic in place. Because PLA has a tendency to stay gooey for a few seconds, you need your part cooling fan blowing at maximum speed to instantly freeze the plastic in place, especially when printing bridges and overhangs.
- Print Speed: 40 – 60 mm/s for standard printers. If you have one of the newer, lightning-fast printers, you can easily push PLA to 200+ mm/s without breaking a sweat.
- Retraction Settings: Retraction Settings: Retraction pulls the filament back up the nozzle slightly when the print head moves across an empty space. This stops the filament from oozing and creating those messy, hairy “strings” all over your print.
- For Direct Drive Extruders: 0.5mm – 2.0mm distance at a speed of 25 – 45 mm/s.
- For Bowden Extruders: 3.0mm – 6.0mm distance at a speed of 25 – 45 mm/s.
Post-Processing and Finishing
So, the print is finished and popped off the build plate. Now what? Post-processing is how we take a raw piece of filament for 3D printing and turn it into a professional prop or display piece.
Support Removal
During the printing process, it is usually necessary to use tree, linear and lattice supporting structures to assist the printing. Aftering printing, they need to be removed.
The trick to clean support removal is dialing in your Z-distance in your slicer. Leaving a gap of about 0.2mm between the top of the support and the bottom of your model usually ensures they break away cleanly with a satisfying crunch.
Sanding
If you want to paint your model, you ned to sand it smooth. But you must use wet sanding. PLA has a low melting point. If you furiously rub dry sandpaper against it, the dry friction will generate heat, causing the printed piece to melt directly or deform. So immerse the sandpaper in water first.
Painting
First, hit it with a few coats of automotive filler primer. This fills in the microscopic layer lines. After a quick wet sand, you can go to town with standard acrylic paints, airbrushing, or spray paints.
Gluing
Sometimes, a print is just too big for your printer, so you have to print it in pieces. To stick them together, standard Superglue (Cyanoacrylate) works wonders. For an even stronger bond, you can use two-part Epoxy, or a specialty solvent like 3D Gloop that physically melts the two pieces of PLA together.
Proper Storage and Handling
Hygroscopicity
Does PLA absorb moisture from the air? Yes, it has hygroscopic properties. Altough it absorbs water much slower than thirsty filaments like PETG or Nylon, if a spool of PLA filament is placed in a humid room for several months, it will become “wet”.
When you try to print wet PLA filament, the water will boil inside the high-temperature nozzle. You will hear distinct cracking and hissing sounds. The printed product will have bubble-like and stripe-like marks.
Drying Plastic Filament
If your filament gets wet, you need to dry it. You can use a dedicated filament dryers or even a food dehydrator. The safe PLA printing temperature for drying is usually between 45°C and 50°C. Leave it in there for about 4 to 6 hours, and it will print like it is brand new.
Storage Solutions
To avoid moisture altogether, proper storage is very important. When you aren’t using your PLA filament for printing, put it away and put it in vacuum-sealed bags.
You can also build “dry boxes” out of plastic storage bins with heavy-duty weather stripping. Just toss a handful of rechargeable silica gel packets in the bottom to eat up any ambient humidity.
What is PLA Filament Used for?
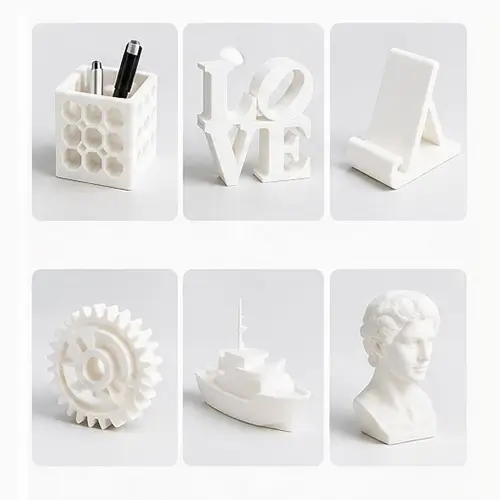
Because it holds incredible detail and is so easy to print, PLA filament for 3D printing is the absolute gold standard for rapid prototyping, desk toys, and intricate miniatures. It is heavily favored by the tabletop gaming community for printing Dungeons & Dragons terrain. It is also the go-to material for cosplayers building massive, highly detailed helmets and armor pieces. Indoor household organizers, drawers, and brackets are also perfect use cases.
When NOT to Use PLA
Think of PLA as an indoor material that prefers room temperature and an easy life. Because it softens so easily in the heat, it completely fails the “hot car test.” If you have a PLA phone mount on your dashboard on a summer day, or put it outside in direct sunlight, it may melt into a droopy puddle.
It’s also fairly brittle, meaning it can snap under pressure. If you are making a structural part that needs to carry heavy weight or handle a lot of stress, standard PLA isn’t the right tool for the job.
If your project needs to survive high heat, sit out in the summer sun, or do some heavy lifting, leave the PLA and use tougher materials like PETG or ABS instead.
Conclusion
In the end, PLA 3D printing material is one of the most popular materials at present. It has a wide tolerance range and a broad color selection, and can achieve stunning results without the need for industrial-grade equipment.
Of course, you need to pay attention to the temperature control during PLA 3D printing, and also remember to keep the spool of filament dry and away from damp environments.
So, what are you waiting for? Install the spool, set up the model, preheat the bed surface, and then witness the birth of the printed piece.