
PLA is widely regarded as the beginner-friendly filament to use. However, the vast majority of failed prints—stringing, layer splitting, warping, and poor adhesion—are almost always caused by incorred temperature settings.
Adjusting the PLA printing temperature setting is the key to determining whether your prototype is fragile and cluttered, or the finished model is clean, strong and beautiful.
In this guide, we will dive deep into how temperature governs everything your printer does, how to find that elusive ideal temperature point, and how to troubleshoot the annoying issues.
Understanding PLA’s Thermal Personality
PLA is derived from renewable resources like cornstarch or sugarcane. Because of this organic origin, it has a fairly unique thermal profile.
Its glass transition temperature—the point where it changes from a rigid, glassy state to a soft, rubbery state—is remarkably low, usually hovering around 55°C to 65°C. To put that in perspective, if you leave a PLA print in a hot car on a summer afternoon, it will easily soften and deform. It’s not actually melting, but it has crossed that glass transition threshold.
This low glass transition point makes PLA incredibly easy to print because it doesn’t require a burning-hot enclosure to prevent warping, unlike ABS or polycarbonate. However, it also means PLA is highly sensitive to heat.
The temperature of your hot end directly controls:
- How well the layers bond together (interlayer strength)
- The surface finish (shiny vs. matte)
- The tendency to string or ooze
- The overall dimensional accuracy of your final piece
Basically, your chosen PLA printing temperature is the master dial that influences almost every physical property of your print.
Overview of PLA Print Temperature
Before we get into the details, let’s look at a general snapshot of the typical temperatures you’ll deal with when printing with a standard PLA 3D printing filament.
| Metric / Component | Typical Temperature Range | Notes |
| Nozzle Temperature | 190°C – 220°C | General printing window; varies by speed and brand |
| Heatbed Temperature | 50°C – 60°C | Promotes bed adhesion; minimizes warping |
| Build Plate Type | Ambient to 60°C | PEI sheet, glass plate, or painters tape |
| Melting Temperature | 150°C – 180°C | The physical temperature where solid turns to liquid |
| Glass Transition Temp | 55°C – 65°C | The point where PLA begins to soften and lose rigidity |
Nozzle Temperature for PLA Filament
Most standard PLA filaments perform best within a window of 190°C to 220°C, but results can vary within this board range.
1. Lower Temperatures (190°C – 200°C)
At this cooler end of the spectrum, the plastic is relatively viscous as it exits the nozzle.
You’ll get highly controlled extrusion, crisp details, excellent bridging over open gaps, and almost zero stringing.
However, interlayer adhesion may be weak. Because the extruded plastic is cooler, it doesn’t melt and fuse as deeply into the layer below it. This can make your parts brittle and prone to snapping along the layer lines.
2. Media Temperatures (205°C – 215°C)
Under this range, the plastic filament melts enough to provide excellent layer bonding, meaning your parts will be much stronger, while still retaining decent detail. But stringing may increase if retraction settings are not quite tuned.
3. High Temperatures (215°C – 220°C)
This range is usually reserved for fast printing or working with specialized, high-performance PLA blends.
The plastic flows incredibly fast and smooth, which is ideal if you are printing at speeds over 150 mm/s or using larger nozzles (like 0.6 mm or 0.8 mm). The surface finish also tends to look shinier and glossier.
At this heat level, the plastic can become very runny. You’ll likely encounter severe stringing, oozing from the nozzle when it’s idle, messy blobs on the surface of your prints, and sagging on overhangs.
Of course, there are also some high-performance PLA filament series designed to withstand even higher nozzle temperatures without breaking a sweat. Generally, though, most standard PLA rolls perform beautifully around 200 ℃ to 210 ℃.
How to Accurately Find the Optimal Nozzle Temperature
So, how do you find the perfect PLA printing temperature setting for your specific machine and spool of filament?
The Temperature Tower
The most reliable method is printing a temperature tower. This is a simple, stacked calibration model where each section of the tower is sliced to print at a progressively lower temperature (for example, starting at 220°C at the bottom and dropping by 5°C increments for each block until it hits 180°C).
When printing the temperature tower, you will receive a physical visual aid that accurately shows the performance of this specific PLA 3D printing material across the entire temperature range. You can examine the bridging areas, overhanging parts, tiny text, and sharp cones to identify the parts with the clearest printing effect.
Don’t just focus on the areas that look the most beautiful or smooth. Gently press and rotate the printed piece. Sometimes the parts that appear the cleanest may actually be very fragile. You should choose the temperature that achieves the best balance between detail clarity and structural strength.
Observation and Fine-Tuning
Once you think you have the right temperature, keep an eye on your first few real prints.
- Signs of Too Low Temperature: Layer delamination, extruder gear skipping (clicking sound), rough and matte surface, parts easily snapping along layer lines.
- Signs of Too Low Temperature: Severe stringing, nozzle oozing when idle, blobs on the surface, blurred details, or sagging overhangs.
Adjustment Principle: Always adjust in small 5°C increments. It is very tempting to jump 15°C when a print looks bad, but 3D printing is a game of subtle micro-tweaks. A tiny 5°C adjustment is often all it takes to make a qualitative leap in print quality.
Bed Temperature for PLA
For standard PLA, the ideal heatbed temperature is between 50°C and 60°C.
At 50°C, the plastic remains just warm enough to stick well to surfaces like PEI or glass, while minimizing the risk of a phenomenon known as “elephant’s foot”—where the weight of the print presses down on a too-soft bottom layer, causing it to bulge outward.
At 60°C, you get much stronger bed adhesion, which is fantastic for large prints with wide flat bases, or if you are printing in a cooler room where the plastic might want to peel or warp off the bed. If you notice the corners of your print lifting and curling upward during a print, bumping your bed temperature up by 5°C will often solve the problem.
The First-Layer Temperature Strategy
The first layer is the foundation of your entire print. If it fails, the whole print fails. To set yourself up for success, try this handy strategy:
Increase the nozzle temperature by about 5℃ for the first layer, while also setting the bed 5℃ higher (e.g., 60°C). Turn off the cooling fan and print slowly for the first layer. This combination improves bed adhesion reliability.
- Boost the Nozzle Temperature: Set the nozzle about 5°C hotter for the very first layer (e.g., if you print at 200°C, print the first layer at 205°C). This makes the plastic more fluid, allowing it to flow deeply into the microscopic pores of your build plate.
- Boost the Bed Temperature: Set your heatbed temperature 5°C higher for the first layer (usually 60°C) to maximize initial stickiness, then let it drop to 55°C for the rest of the print.
- Turn Off the Cooling Fan: Keep your part cooling fan completely off for the first 1 to 2 layers. Rapid cooling on the first layer is a recipe for warping.
- Print Slow: Keep your first layer speed down to about 20–25 mm/s. Give the warm plastic time to lay down and grip the bed.
How Temperature Interacts with Other Key Variables
Temperature is closely tied to several other printer settings and hardware factors.
1. Printing Speed
Speed and temperature are linked. If you decide to print faster, you have to print hotter.
Imagine your printer running at a standard 50 mm/s. The filament has plenty of time to sit in the hot zone and melt thoroughly before exiting. But if you upgrade to a high-speed printer running at 250 mm/s, the filament is flying through the hotend. To melt that volume of plastic in a fraction of the time, you need to bump your PLA printing temperature setting up by 15°C to 20°C, sometimes pushing past 225°C or 230°C.
If you slow down for a highly detailed print, you should do the opposite: drop the temperature slightly to prevent the filament from cooking in the nozzle and stringing.
Learn more about the printing speed of PLA: PLA Print Speed: What is the Best Speed for Your 3D Prints?
2. Cooling Fan
Cooling and temperature form an integrated system. Strong cooling improves details and bridging but, combined with low temperatures, can severely weaken layer adhesion. For most prints, running the fan at 100% after the first couple of layers.
However, if the aggressive cooling method is combined with the PLA filament nozzle temperature (like 190℃), the plastic will solidify before it can fully bond with the underlying layer material. If you are printing structural or functional components that need to withstand loads, it is recommended to set the cooling fan to 50% or 70%, or slightly increase the nozzle temperature to maximize the strength of the components.
3. Hardware Differences
The printer hardware is different, and so are the temperature settings. An all-metal hotend may require a ±5°C adjustment compared to a PTFE-lined hotend due to different heat transfer characteristics.
The Influence of Environmental Factors on Temperature
Environmental Temperature and Air Flow
Room temperature and drafts are often overlooked culprits. Cold environments require slightly higher nozzle and bed temperatures; drafts cause uneven cooling and warping. When using an enclosure, the trapped heat may actually require a slight reduction in nozzle temperature.
Dryness of Filament
Wet filament is a “temperature black hole.” PLA 3D printing filament is prone to absorbing moisture from the air over time.
When mositure-laden filament enters a 200℃ hotend, the trapped water instantly boils and turns to steam. This causes tiny micro-explosions inside the nozzle, leading to inconsistent extrusion, rough surface textures, and a massive increase in oozing and stringing.
You might think that increasing the temperature would help melt it better, but more heat only makes the steam issue worse. So, before adjusting the PLA printing temperature settings, make sure the filament is dry.
Temperature Guidelines for Special PLA Filament Variants
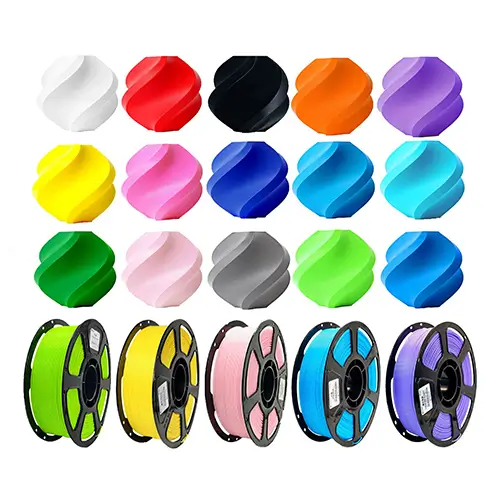
Nowadays, there are various variants of PLA filament, and each material has its unique temperature requirements.
- Silk PLA: Silk PLA is infused with elastomers to give it that brilliant, shiny, metallic look. To really bring out that signature shine, it generally needs to be printed slightly hotter (around 205°C to 215°C) and a bit slower. Printing it too cold will leave you with a disappointing matte finish.
- Matte PLA: On the flip side, matte PLA uses additives to scatter light and hide layer lines. It usually prefers cooler settings (190°C to 200°C) to maintain that chalky, premium-looking texture. If you print it too hot, it can take on an unwanted semi-gloss appearance.
- Wood PLA: This variant contains actual organic wood fibers. It is highly prone to burning and clogging. Keep your temperature on the lower side (185°C to 200°C) to prevent the wood particles from charring inside the hotend, and always use a larger nozzle (0.5 mm or larger) to let those fibers pass through safely.
- Carbon Fiber PLA: Infused with tiny carbon fiber strands for stiffness. Because the carbon fibers act as tiny heat sinks, you’ll want to print this slightly hotter than standard PLA. Keep in mind you must use a hardened steel nozzle, as carbon fiber will quickly destroy a standard brass nozzle.
- Transparent PLA: To get the best optical clarity, you want to melt the layers together as completely as possible to eliminate internal air pockets. Print hot (215°C to 220°C) and very slow, with minimal cooling.
Universal Rule: Always print a temperature tower first when using any new filament.
Troubleshooting and Fine-Tuning Methods
After initial temperature calibration, fine-tuning based on actual print performance is still necessary. Here are common issues and their targeted solutions:
- Excessive Stringing: Lower the current temperature by 5°C. Check that your retraction settings are tuned, and ensure your filament isn’t damp.
- First Layer Not Sticking: Increase bed temperature (5°C at a time). Slow down the first layer speed, and disable your part cooling fan for the first few layers.
- Layer Splitting or Weak Parts: Increase nozzle temperature by 5°C to encourage better melting and interlayer fusion. You can also try reducing your cooling fan speed slightly.
- Extruder Clicking/Skipping: Your nozzle is likely too cold to melt the plastic fast enough. Increase your hotend temperature by 5°C, or slow down your print speed.
- Irregular Blobs or Bubbles on Surface: Your filament might be too hot and runny, causing it to ooze during travel moves. Lower the nozzle temperature by 5°C. If that doesn’t work, dry your filament.
- Sagging Overhangs or Bridges: Run a temperature tower to find the lowest temperature that still gives you good layer adhesion, and ensure your part cooling fan is running at 100%.
- First Layer “Elephant’s Foot” (Spreading): Your bed is likely a bit too warm, keeping the bottom layers in a semi-soft state. Lower your bed temperature by 5°C.
Core Principle: Change only one variable at a time, in increments of 5°C. A large, sudden change often masks the real cause of the problem.
Build a System
Instead of treating every print like a guessing game, start building a reliable system.
Label the optimal temperature directly on the spool, and create dedicated slicer profiles for each brand and even each color of PLA bundle.
Replace random adjustments with 5°C micro-tweaks, validate your instincts with calibration models, and solidify your experience with notes. Make every print a repeatable success.