
PETG is one of the most popular filaments for functional 3D printing. It is stronger than PLA and much easier to print than ABS. But getting the PETG print temperature right is the key to success.
This guide covers everything you need to know about PETG printing temperature, from the ideal range to troubleshooting common issues.
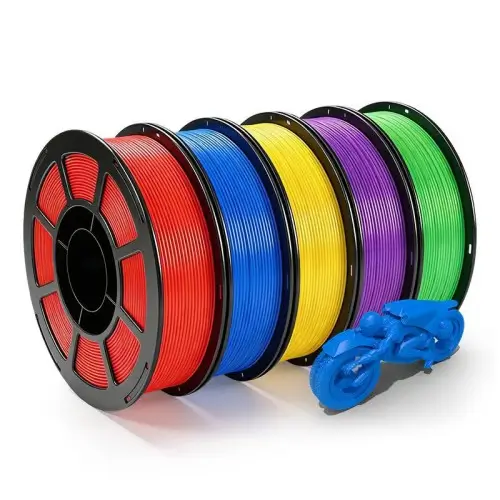
Quick Reference Cheat Sheet
Before we dive into the deep technical stuff, here is a quick reference table to get your slicer configured right away. Consider these your gold-standard starting points for setting your PETG print temperature and related print parameters.
| Parameter | Recommended Range | Best Starting Point |
|---|---|---|
| Nozzle Temperature | 230°C – 250°C | 240°C |
| Heated Bed Temperature | 70°C – 90°C | 80°C |
| First Layer Nozzle | +5℃ above normal | 245°C |
| Cooling Fan Speed | 30% – 50% | 0% (Layers 1-3) 20-30% (Rest) |
| Print Speed | 30 – 60 mm/s | 45 mm/s |
Adjust these settings based on your specific filament and printer.
What is PETG? Key Properties You Should Know
PETG stands for Polyethylene Terephthalate Glycol. It is a modified version of PET—the same plastic used to make water bottles.
The “G” (glycol) makes the material less brittle and easier to print.
Main PETG Properties
- Strong and tough—It blends before it breaks. Unlike PLA, it does not snap easily.
- Heat Resistant—It can withstand temperature up to 75-80℃ before deforming.
- Moisture sensitive—PETG is hygroscopic. It absorbs water from the air, which leads to stringing and poor surface quality.
- UV resistant—Great for outdoor parts.
- Food safe—With proper handling and the right additive (check manufacturer specs).
- High layer adhesion—When printed correctly, layers fuse into a solid, strong structure.
- Moderate printing difficulty—Sits between PLA (easy) and ABS (hard).
Learn more about PLA filament: The Basics of PLA Filament for 3D Printing.
PETG is perfect for brackets, enclosures, clips, and any part that needs strength or heat resistance.
Recommended PETG Temperature Ranges
So, what numbers should you actually type into your slicer? Let’s break down the optimal settings for both your nozzle and your build plate.
Nozzle Temperature Range (230°C to 250°C)
For 90% of standard PETG 3D printing filament spools, the magical sweet spot for nozzle heat lives somewhere between 230℃ and 250℃. A temperature of 240°C is the sweet spot for most brands.
- The High-End Range (245°C – 260°C): Pushing your PETG print temperature toward the upper limit gives you maximum layer bonding strength. The melted plastic is thin enough to deeply fuse into the underlying layer, yielding a gorgeous, glossy finish. The downside? You will run a much higher risk of fine stringing and oozing across travel moves.
- The Low-End Range (220°C – 235°C): Dropping your PETG print temp down closer to 225°C or 230°C creates a cleaner print with noticeably less stringing. However, there’s a trade-off: your mechanical layer strength will drop, and the finished part will look more matte or dull than glossy.
Bed Temperature (70°C to 90°C)
Don’t neglect your print bed! Maintaining an accurate bed temperature is crucial for first-layer adhesion and preventing corner warping.
- Textured or Smooth PEI Sheets (70°C – 80°C): PEI surfaces grip PETG extremely well—sometimes too well. Keeping your bed at 70°C to 75°C provides enough grip to prevent warping without permanently welding the print to your sheet.
- Glass Beds (80°C – 90°C): Glass requires slightly higher heat settings to transfer energy through its thickness properly. Set your bed to 80°C–85°C.
Key Factors That Impact PETG Print Temperature
1. Filament Brand, Color & Additives
Different brands use different additives. Even different colors from the same brand can have slightly different optimal temperatures.
- Transparent/Clear PETG: Prefers slightly higher heat (~245°C) to maximize optical clarity. If printed too cool, microscopic internal air pockets remain trapped, making the part look cloudy.
- Composite PETG (Carbon Fiber / Glass Fiber): These additives conduct heat differently and drastically increase viscosity. They demand higher temperatures (often 250°C–260°C) and wear out brass nozzles fast.
- Dark Pigments: Black/darker dyes can alter thermal absorption slightly compared to light colors. so they sometimes require a minor 2°C–3°C bump in temperature to flow at the same rate.
2. Nozzle Material
Not all nozzles conduct thermal energy equally.
- Brass Nozzles: Brass has excellent thermal conductivity. Your target PETG print temperature on brass matches baseline slicer values directly (usually around 235°C–240°C).
- Hardened Steel / Stainless Steel: Steel is terrible at transferring heat compared to brass. If you switch to a hardened steel nozzle, you must increase your target print temperature by 5°C to 10°C just to get the plastic inside the nozzle up to its true melting point.
- Tungsten Carbide / Ruby: These high-end nozzles offer phenomenal wear resistance while retaining thermal conductivity similar to brass, meaning minimal temperature adjustment is required.
3. Nozzle Size & Layer Height
Switching from a standard 0.4mm nozzle to a 0.6mm or 0.8mm monster pushes more mass through the heater block per second.
Standard layer height is 0.2mm on a 0.4mm nozzle. Thicker layers (0.25-0.3mm) need higher temperature (+5°C to +10°C) for proper bonding.
4. Cooling Fans
PETG needs moderate cooling. Over-cooling freezes the extrudate before it can melt into the layer below, resulting in brittle parts that snap along layer lines under light pressure.
- First 2 to 3 Layers: 0% Fan Speed. You want maximum heat retention here to ensure the plastic flows smoothly into the build plate and seals firmly.
- Standard Layers: 30% to 50% Fan Speed. Keeping your fan running at a low, gentle whisper provides just enough cooling to keep bridging and sharp corners tidy without sacrificing thermal bonding between layers.
- Overhangs & Bridges: Set fan overrides in your slicer to ramp up to 70%–80% only when printing steep unsupported overhangs or long bridges.
5. Print Speed
If your PETG print speed is cruising along at a conservative 40 mm/s, the filament spends plenty of time inside the hotend melt zone absorbing heat. But if you double that speed to 100 mm/s or push high-speed setups, the plastic passes through the hotend in a fraction of a second. To melt that same volume of plastic per second, you must raise your PETG print temperature to compensate for the reduced dwell time.
Modern high-speed CoreXY machines (such as Bambu Lab, Creality K1, or Voron builds) print at velocities unthinkable a few years ago. When pushing a modern “High-Speed PETG” or standard PETG filament at 150–250 mm/s, standard hotends simply can’t keep up at 240°C.
To print PETG fast without under-extruding, you’ll need to crank your PETG print temperature up to 255°C, 265°C, or even 270°C, paired with a specialized high-flow hotend block.
- Slow Speed (30-50 mm/s) –> Longer Dwell Time –> Lower Temp Needed (~235°C-240°C)
- Fast Speed (100-200+ mm/s) –> Short Dwell Time –> Higher Temp Needed (~250°C-265°C)
6. Moisture Level
PETG is moderately hygroscopic, meaning it greedily absorbs water vapor from surrounding air like a dry sponge. When wet filament enters a 240°C nozzle, that trapped water instantly boils into tiny pockets of steam. This creates popping noises, heavy stringing, rough surfaces, and severe oozing.
So dry printer filament at 50-60℃ for 6-8 hours before printing. Store it in an airtight bag with silica gel.
7. Enclosure & Room Environment
Unlike ABS, PETG does not strictly require an enclosed printer chamber. However, ambient air drafts take away heat when printing, which can lead to warp.
If your printer sits in a cold room (below 18°C / 65°F), you may need to raise both your nozzle and bed settings slightly to counteract ambient heat loss.
How to Find the Right Temp: Running a Temperature Tower
Every single brand of PETG 3D printing filament—and sometimes even different color batches from the same manufacturer—has its own sweet spot. The absolute best way to pinpoint your ideal PETG print temperature is by running a calibration Temperature Tower.
Step 1: Dry Your Filament First
If you suspect it has absorbed humidity, do not remove a fresh spool straight out of the vacuum bag without drying to run a temperature test. Water bubbles can distort test results, making each temperature tier look like an oozing, stringy mess.
Step 2: Slice a Temp Tower
Download a standard calibration temp tower STL from your favorite 3D model repository. Configure your slicer so that the nozzle heat drops by 5°C at each horizontal step, covering a span from 260°C down to 220°C.
Step 3: Evaluate the Print Results
Once the tower finishes printing, examine each temperature block carefully:
- Inspect Stringing & Oozing: Look closely at the open gaps between towers. Lower temperature tiers usually show fewer fine strings, while hotter tiers might look like cobwebs.
- Check Overhangs & Bridges: Look underneath the angled overhangs and horizontal bridges. Which temperature preserved clean, sharp, droop-free lines?
- Test Surface Finish: Notice how the glossiness changes. Higher temperatures result in a brilliant shine; cooler temps turn the surface matte.
- Perform the Destruction Test: Grab the tower with both hands and try to snap it along the layer lines at different temperature zones. The ideal printing temperature for PETG is as low as possible while still ensuring the maximum layer strength. At this point, it is impossible to break the print piece by hand.
Step 4: Save Custom Slicer Profiles
Once you discover that Brand X Clear PETG prints best at 242°C, save a dedicated material profile in your slicer (e.g., “PETG – Brand X – 242C”). That way, you never have to repeat the setup process for that spool again.
PETG Temperature Troubleshooting Guide
Setting the wrong PETG print temperature causes specific, identifiable problems.
Printing Too Hot (Above 250 °C)
Symptoms:
-Excessive stringing (spider-wed strands)
-Blobs and “zits” on the surface
-Dark, burnt spots on the print
-Rounded corners and melted details
-Sagging overhangs
-Oozing from the nozzle during idle
Solutions:
- Lower the temperature by 5°C increments
- Increase retraction distance and speed
- Enable “coasting” (stop extruding 0.2-0.5mm before the end of a line)
- Enable retraction “wipe”
- Increase travel speed to reduce ooze time
Printing Too Cold (Below 230 °C)
Symptoms:
-Weak layer adhesion (layers peel apart)
-Matte, dull surface instead of gloss
-Under-extrusion (gaps in walls)
-Brittle prints that snap easily
-Cling or skipping from the extruder
-Rough, unfinished surface
Solutions:
- Raise the temperature by 5°C increments
- Check for a clogged nozzle
- Reduce print speed to allow more melting time
- Lower the cooling fan speed
- Ensure filament is dry
Common Issues Quick Reference
| Issue | Likely Causes | Fix |
|---|---|---|
| Stringing | Too hot or wet filament | -5℃; dry filament, tune retraction |
| Weak layers | Too cold or too much cooling | +5℃; reduce fan to 30%—50% |
| Blobs/Zits | Over-extrusion from oozing | -5℃ to -10℃; enable coasting |
| Rough surface | Wet filament or temp too low | Dry filament; +5℃ |
| Nozzle clogs | Too high temp causing carbonization | Lower to 230°C–240°C; clean nozzle |
| Bed adhesion too strong | PETG bonding to smooth PEI/glass | Use glue stick; wait for bed to cool before removal |
Frequently Asked Questions
Q1: Can I print PETG without a heated bed?
Not recommended. Without a heated bed set between 70°C and 90°C, PETG will almost certainly warp, lose adhesion mid-print, and detach from the build plate, leaving you with a tangled mass of plastic spaghetti.
Q2: What happens if PETG is printed at PLA temperatures (190°C–220°C)?
The filament won’t melt thoroughly, leading to extruder gear slipping, clicking, and immediate nozzle clogs.
Q3: Does nozzle material affect the ideal PETG print temperature?
Yes, hardened steel nozzles require an increase of 5°C to 10°C compared to standard brass nozzles due to lower thermal conductivity.
Q4: Is an enclosure required to control PETG printing temperature?
No, PETG does not require an enclosed chamber like ABS. But keeping it away from cold air drafts will improve first-layer adhesion and prevent subtle corner warping.
Conclusion
With the right print temperature and settings for PETG, you will get strong, durable, and good-looking functional parts. PETG rewards careful calibration with outstanding results.
Ready to start printing? Dry your filament, set your nozzle to 240°C, and run a temperature tower. Your perfect PETG profile is just a few test prints away.