
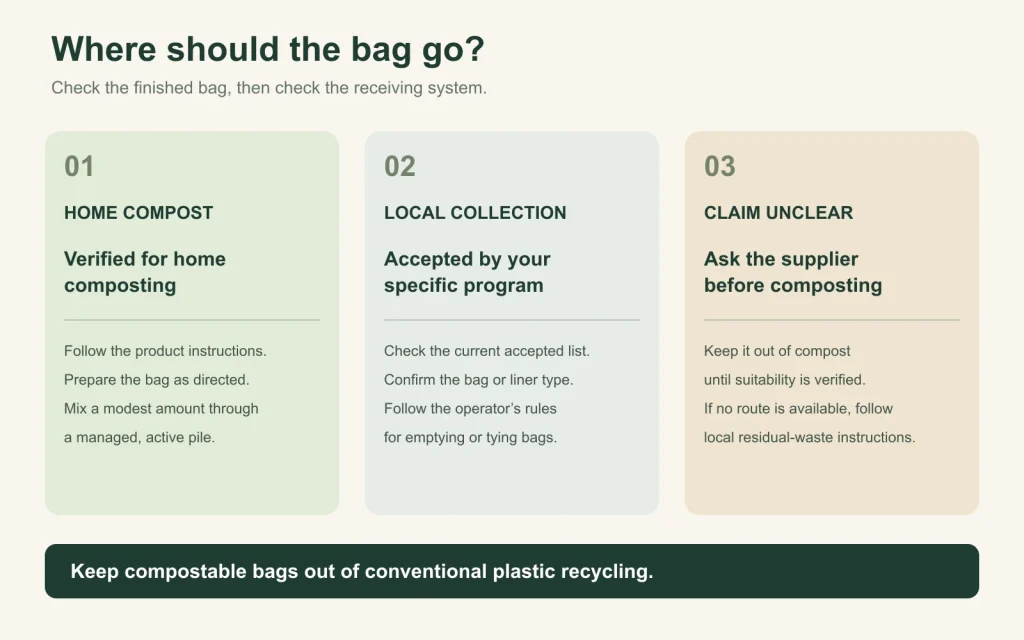
To work out how to dispose of compostable plastic bags, first check whether the finished bag supports home composting or needs a commercial facility. Then confirm that your chosen system accepts it. A compostable label does not mean the bag belongs in every organics bin, in plastic recycling, or buried in the garden.
If you want to compost at home, start with food scraps and garden materials. Get that process working before adding suitable packaging. A bag helps collect scraps; the leaves, food, moisture, and air in the pile do the work of composting.
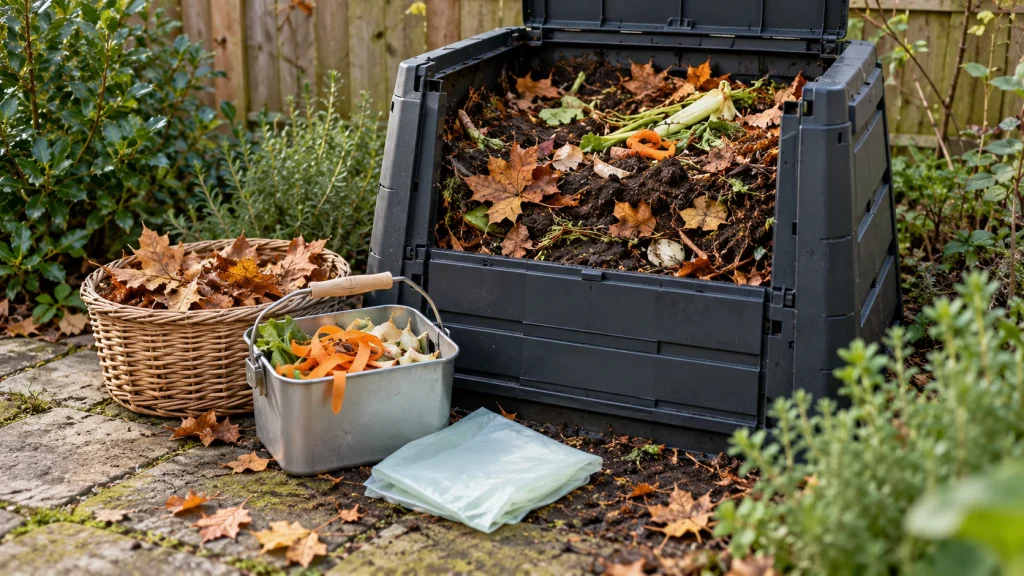
Illustrative garden setup. Cover newly added food scraps with dry browns after mixing.
How to Dispose of Compostable Plastic Bags: Choose a Route
Read the disposal instructions on the bag or its packaging. Look for a clear distinction between home and commercial composting. Color, texture, and words such as “plant-based” or “biodegradable” do not identify a suitable disposal route on their own.
| What you have | Where to start | What to check |
|---|---|---|
| A bag explicitly certified for home composting | A managed backyard compost bin or pile | The finished product’s instructions, including any preparation requirements |
| A bag intended for commercial composting | A local organics collection or accepting drop-off facility | Whether that particular program accepts compostable bags |
| A bag with an unclear or unverifiable claim | Ask the supplier for the product’s disposal instructions | Keep it out of compost until its suitability is established |
| A conventional plastic bag | Follow local waste or plastic-film collection instructions | Keep it out of food-scrap compost |
Home compostability and local collection acceptance are separate questions. A collection service can reject packaging even when the packaging has a valid compostability certification. Some services accept specified liners but exclude other compostable products.
Keep compostable bags out of conventional plastic recycling and store-return film bins unless the operator explicitly provides a separate route for them. An ordinary recycling symbol on another household item does not tell you where this bag belongs.
What Can You Put in a Home Compost Bin?
Build an ordinary backyard pile around plant-based food scraps and garden waste. Sort the contents before they reach the bin. A home-compostable bag cannot make its contents suitable for composting.
| Material | Practical examples | How to handle it |
|---|---|---|
| Browns: dry, carbon-rich materials | Dry leaves, shredded plain cardboard, small untreated woody trimmings | Break up bulky pieces and remove tape, plastic coating, and labels |
| Greens: moist, nitrogen-rich materials | Vegetable peelings, fruit scraps, coffee grounds, fresh grass clippings | Mix them through dry material; avoid thick, compacted layers |
| Items to leave out of a basic backyard pile | Meat, fish, dairy, grease, pet feces, cat litter, diapers | Use the appropriate local disposal route |
| Contaminants to remove | Produce stickers, conventional plastic, glass, metal, coated packaging | Pick them out before emptying the caddy |
“Green” and “brown” describe how materials behave in compost. Coffee grounds count as greens even though they are brown. Dry leaves and fresh grass also behave differently, despite both coming from the garden.
Set a small container of dry leaves beside the compost bin. It makes covering the next caddy of scraps easier. A supply of shredded plain cardboard can help when leaves are scarce, but remove any plastic tape first.
Avoid treating every paper or plant-derived item as compostable. A shiny coating, adhesive layer, or mixed material can change where an item belongs. If the construction is unclear, keep it out while you check.
How to Compost at Home for Beginners
Begin with a routine you can maintain: collect suitable scraps, mix them with dry material, and check the pile regularly. You can collect food waste in a reusable kitchen caddy without a liner. If you use compostable kitchen bin liners, choose them for the disposal system you will actually use.
1. Choose a bin and an accessible spot
Place the compost bin where you can reach it with a full caddy and a watering can. A far corner may look tidy on a plan, but it is less useful if you avoid it in bad weather. Follow the bin manufacturer’s advice on ventilation, drainage, and pest protection.
A stationary garden bin suits a steady supply of kitchen scraps and leaves. A tumbler can make mixing easier, although its capacity limits how much material you can add. Once it is full, allow that batch to finish rather than continually topping it up.
The container should support airflow and let you manage excess water. A sealed bucket of wet scraps is a collection container, not a working aerobic compost pile. On a patio, check how the chosen system handles drainage before filling it.
Keep a fork or mixing tool nearby. You are more likely to loosen a compacted patch when the tool is already beside the bin. Gloves and a small supply of dry material complete a useful basic setup.
2. Mix dry material with food scraps
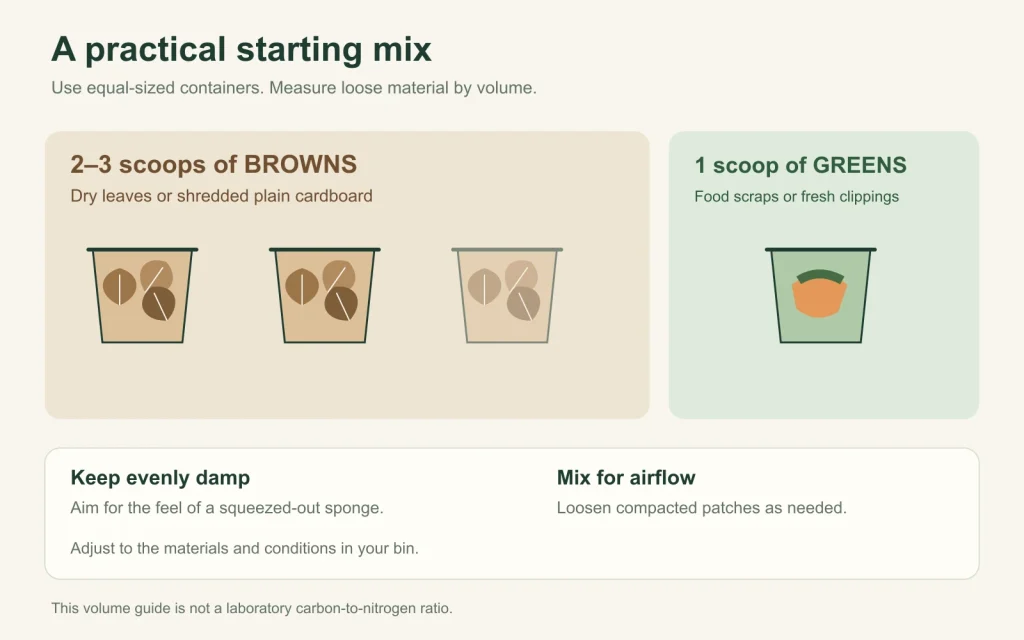
Use roughly two to three containers of dry browns for each equal-sized container of greens as a starting point. For example, a small bucket of vegetable scraps can be mixed with two or three loosely filled buckets of dry leaves. This is a volume guide, not a measured carbon-to-nitrogen ratio.
The EPA’s home composting guidance provides this starting approach. Adjust it to the materials you have: leaves, grass, and shredded cardboard differ in moisture, density, and structure. The finished mixture should stay open enough for air to move through it.
Chop large vegetable pieces and break up clumps. Spread grass clippings through the mix instead of tipping in a dense mat. Cover fresh food scraps with browns so they are not exposed on the surface.
3. Check moisture and loosen compacted areas
Aim for an evenly damp mixture. A handful should feel similar to a squeezed-out sponge, rather than dusty or dripping. Check material below the surface too; a dry-looking top can hide a wet, compacted center.
If the mixture is dry, add water gradually while mixing. Pouring a large amount onto the top can leave some areas soaked and others unchanged. If it is soggy, mix in dry, coarse material and investigate whether rain or poor drainage is contributing.
Turn or loosen the material when it becomes compacted, smells unpleasant, or needs more even moisture. Move some material from the edges into the center as you work. The right frequency depends on the system and your chosen pace; there is no universal turning day.
Check the pile after several additions of scraps. If every addition is wet food waste, the balance can drift even when the first batch looked right. Keep replenishing the browns rather than relying on the original layer.
4. Let a batch finish before using it
Separate the finishing batch from newly added scraps. With two bins, move the older material into the second one. With a single bin, stop adding fresh material for a period or follow the system’s method for removing finished compost from below.
Look for a dark, crumbly texture and an earthy smell. Recognizable food scraps mean more processing is needed. Cooling alone is not proof of maturity: a pile can also cool because it has dried out or conditions have slowed decomposition.
Once active decomposition has largely finished, let the material cure for at least four weeks before using it, as EPA advises. Screen out larger unfinished pieces and inspect for contamination. Suitable woody pieces can return to an active batch. Remove plastic or unverified packaging instead of spreading it through garden soil.
How to Dispose of Compostable Plastic Bags at Home
Add a bag only when its finished-product instructions support home composting. A material description such as “cornstarch blend” does not establish how the finished bag, printing, and any attached components should be handled.
Empty the bag and check its contents first. Remove produce stickers, conventional plastic, ties, or labels that are not confirmed suitable. If the instructions recommend cutting or tearing the bag, follow that preparation advice. Smaller pieces provide more exposed surface, but cutting an unsuitable bag does not make it suitable.
Mix a modest amount of suitable bag material through an active pile. Avoid leaving a flat sheet over the surface or a tightly tied bundle inside. Food scraps and garden materials should remain the main feedstock; a pile full of packaging is a different practical challenge.
Watch what happens to the bag separately from the food. Softening, tearing, or disappearance from view does not prove complete biodegradation. If recognizable pieces remain when the compost is otherwise ready, keep them out of the finished batch and continue processing suitable material.
A home-compostable claim also does not automatically cover a worm farm, a bokashi bucket, soil burial, or an electric kitchen appliance. Check the requirements of that specific system before adding packaging.
Fix Common Home Composting Problems
If you’re working out how to dispose of compostable plastic bags left in a stalled batch, inspect the whole pile first. Adding more bags, more food scraps, or a commercial accelerator will not automatically solve a moisture or airflow problem.
| What you notice | What to check | A useful next step |
|---|---|---|
| A sour or rotten smell | Wet, compacted material and poor airflow | Loosen the pile, mix in dry browns, and address excess rain or drainage |
| A sharp ammonia smell | Too much nitrogen-rich material, often fresh grass | Mix in dry carbon-rich material and break up dense patches |
| Fruit flies around fresh scraps | Food left exposed on the surface | Cover additions with browns and empty the kitchen caddy regularly |
| A dry pile with little visible change | Moisture below the surface | Add water gradually while mixing, then reassess |
| A cool pile | Size, weather, moisture, and recent additions | Check the mix; a small or cold pile can decompose slowly without becoming hot |
| Bag pieces remain after food scraps disappear | Product suitability, preparation, and pile conditions | Keep pieces out of finished compost; continue processing only verified suitable material |
Change one obvious problem first and check again. For instance, if the bin smells sour and contains a heavy mat of wet grass, break up that mat and add dry material. Adding water because the surface looks dry could worsen the center.
Pest activity deserves attention too. Keep unsuitable food out, cover fresh additions, and check the bin’s lid and openings. Repeated visits from rodents call for better exclusion and a review of what you are adding, rather than simply another layer of scraps.
How Long Does Home Composting Take?
Expect the pace to vary with the ingredients, season, moisture, airflow, and how you manage each batch. A frequently managed pile and a small bin receiving occasional scraps will not follow the same timetable. Plan around the condition of the compost, not a date printed on a calendar.
For orientation, EPA describes about three to five months for a well-maintained pile and a year for an untended one. Those are general estimates for organic compost, not promised breakdown times for a bag. Weather and the materials in your bin can change the result.
Keep two separate questions in mind: when is the organic material ready to use, and has the packaging completed its intended breakdown? A pile can look mostly finished while recognizable bag pieces remain. Certification test conditions and maximum test periods do not guarantee the same result in your garden.
Our explanation of how long compostable bags take to decompose covers the distinction between bag types and composting conditions. Use product-specific instructions alongside observations from your own bin.
A simple batch note can help: record when you stopped adding scraps, any moisture adjustment, and what remains at the next check. This is especially useful when trying a suitable bag for the first time. You can see whether the food and packaging are progressing together without guessing from memory.
What If You Cannot Compost at Home?
Check for an accepting food-scrap collection service, community site, or commercial composting facility. Ask specifically about compostable bags. A program that accepts food waste may still require scraps loose, in paper, or in an approved type of liner.
Before taking anything to a drop-off, check the operator’s current accepted-materials list. Ask the operator how to dispose of compostable plastic bags in its system, including whether to leave liners tied or empty their contents. Check any required product listing too. Do not transfer instructions from another city or a different composting service.
If the site accepts scraps but rejects the liner, empty suitable food waste into its designated container and dispose of the liner as instructed locally. The collection benefit for the food does not depend on forcing the bag into that stream.
Without a suitable composting route, follow local residual-waste instructions for the bag. Keep it out of recycling and the natural environment. For future collections, a washable caddy may avoid the need for a disposable liner. This gives you a workable way to separate scraps while you look for a compatible service.
Frequently Asked Questions(FAQS)
Home compostability does not establish suitability for soil burial. A managed compost pile provides a different environment from a hole in the ground. Follow the product’s intended disposal instructions and keep bags out of garden soil unless the product specifically supports that use. Do not treat burial as a substitute for composting.
Check the bag’s instructions and the worm-system guidance separately. A home compost claim does not automatically establish suitability for vermicomposting. You can empty appropriate food scraps into a worm bin and handle the bag through another verified route. Removing the liner avoids making the worms’ environment a packaging trial.
No. A washable kitchen caddy can collect scraps before you transfer them to a suitable system. A liner is optional and mainly helps with collection and cleaning. If you use one, match it to the destination. Choose the disposal route first rather than buying bags and searching for a route afterward.
Only if that collection program accepts it. Product certification and facility acceptance answer different questions. Check the operator’s current list and any preparation instructions. The same applies when a service accepts one type of liner but excludes other packaging. A general compostable claim does not override those local instructions.
Check moisture, airflow, product suitability, and the bag’s instructions first. Continually adding food can delay the point when you can harvest a batch. If the organic material is ready but verified suitable bag pieces remain, separate them for further processing. Remove any material whose identity or suitability you cannot establish.
Treat the bag and its contents separately. For home composting, empty the bag, sort scraps, and remove meat, pet waste, stickers, and conventional plastic. If you need to know how to dispose of compostable plastic bags through a collection service, follow the operator’s rules for filled or tied liners.